With the compilation and release of the first comprehensive Paarl Rocks guide in 2006 we (Scott & Stewart Noy) had expected not many updates would be required. However that was quite obviously not the case! The amount of new routes that have been established since the release of the first guide is encouraging; a mixture of single, multi-pitch, trad, sport and now bouldering, have been established, many of them two and three star lines. It seems the old grey slabs have a few cards yet left to play. Indeed, while there have been many new lines opened there still remains opportunities for more, especially steep harder lines.
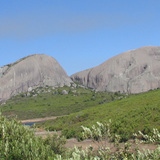
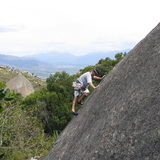
Paarl holds a special dynamic. Something old; something wild; something hidden; an element of the untamed. You can sense the long unspoken history that lives within the rocks, written on the sweeping granite slopes, found in hidden caves and alcoves, revealed only by the feint echoes across the giant slabs and quiet whispers amongst the aged trees.
This guide represents a mix of the old and new; the legend of The Grey Death lives on not only around the campfire stories of old, but in the brave new routes continuing to challenge the stoic grey walls.
The bouldering has added a new flavour to Paarl, with climbers until then only venturing onto the boulders nearby the routes. With the establishment of areas beyond the parking boulders this drew in more climbers and many new problems were established creating what is now a really superb destination for a day out.
NEW ROUTES & BOULDER PROBLEMS
If you have opened any new sport or trad routes, or boulder problems, let us know and we shall add them to the growing topos. Contact us at stu77000@yahoo.com
WALK-IN
Upper Parking
Follow the stairs up left for about 65m and you will find a climbers path on your right that will lead you to the Belly Button Slab, Splinter Area and Blue Diamonds Wall.
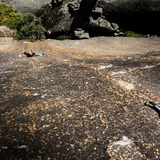
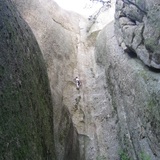
For the other areas follow the path from the parking into the forest and start of the boardwalk (from here you can easily access the Cable's Walk / Descent on your left). The path winds it's way down through the forest between Bretagne Rock (on your left) and Gordon's Rock (on your right) to the bottom, branching off either left or right depending on what you intend to climb. Once reaching the bottom moving right will take you past the Wasteland, Casualties of War and then North Wall around the corner. To reach the Nante's Dam Boulder, branch off from the path before going around to the North Wall, aiming for an area of flat rock (no bush) on the left and then down and left to reach the boulder on the left. It's called a boulder, but it's actually a flattish granite outcrop.
Lower & Bouldering Parking
The Illearth Boulder is found under the trees at the parking. For The Scream Boulder, initially follow the Bouldering path left and parallel with the Illearth Boulder and make your way first over flat rock (the summit of Paarl Rock) in a north-easterly direction toward the large boulder (the path marked in white splits off from the Bouldering Path). The Euro and Cannonfodder Wall path simply stays close to the wall moving down the bushy slope.
The Bouldering path heads left and parallel with the Illearth Boulder toward a plateau of initial boulders and then heads down the slope with boulders scattered widely. You can also park for free at the braai area at the bottom of the boulder field. You still need to be out of the braai area parking itself at closing time as a gate is closed. However if you park along side the road, you can extend your climbing time until late.
Rear Parking
Really easy. Just follow the path to the stunning Parklife Wall directly ahead. Access the wall by heading right at the base and finding a ramp that leads up left. For the Arbor Cave and Hidden By Day Wall just continue on down the hill from the ramp. The Cobalt Blue and Wonderland Walls are found by continuing left along the path once reaching the Parklife Wall.
DESCENTS
Gordon's Rock
Walk: The walk down is relatively quick and easy taking around 10 minutes. From the top of Gordon's Rock find a 'Tolkienesque Gully' hidden by a tree on the south-eastern side of the rock. Move down the gully and squeeze through a hole on the left further on, or lower via a thick rope (people sometimes unfortunately remove this rope when getting lost, so if it's missing you'll have to squeeze through the hole...). Scramble down the short recess, cross the wooded Splitter Gully to emerge on the large flat summit above the Belly Button slab. Continue diagonally right heading down low angled slabs aiming for blocks and brush. Keep left of the blocks on the way down.
Abseil: This was not designed as abseil line and essentially uses the stances of existing routes. Facing the Sands of Time Wall, the abseil starts on the chains of Jovian Thunderbolts and continues down to it's next set of chains. There are many ways down from here but aiming left (facing the wall) for either The Outlaw Josie Wales or Hang 'em High's chains works well as there is another abseil point halfway up Hang 'em High which will get you to the ground. NOTE: A 60m rope is required for this abseil - always REMEMBER to tie knots in the end of your rope! If any of the stances look a little rusty, leave one of your carabiners behind for the abseil.
Bretagne Rock
Walk: Make your way to the top of the rock and trig beacon. From here simply follow the Cable's Route (walk) back down.
Paarl Rock
Walk: A short stroll to your car in a south-western direction.
Two Cents Slab
Walk: Scramble down either side of the granite slab to the road.
Gladde Rock
Walk: Upon summiting either (1) head rightward for approximately 3 minutes to reach a jeep track and make the long walk back down the road to your car, (2) scramble back down avoiding the slabs, or (3) preferably meet up with friends at the Upper Parking.
Abseil: You can abseil back down the route. Additional anchors have been placed between stances to facilitate an abseil using a single rope.
GRADING
For those using the Australian grading system for sport and trad climbs, simply add on one grade to sync up with South African grades.
GEAR
The maximum amount of quickdraws you will require is 26 (includes two needed for the chains) for Hang 'em High. For some of the trad climbs we have included what gear is necessary so that you can consult them before heading out.
WEATHER
Like most areas, autumn and spring are the best times for climbing. However one of the perks of climbing at Paarl Rocks is that a number of the routes dry fairly quickly after the rains. During the summer months it can get quite hot but you will always find one or two walls in the shade.
If we have left out the time period when when the sun hits that wall then that means that wall / area receives all day shade.
For up to date weather reports go to www.weather.co.za, or call 082-162.
CLIMBING INFORMATION
DANGER!
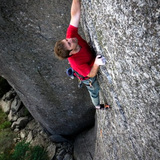
Some of the climbs contained in this guide are either dangerous and / or have long run-outs. Falls on certain routes could result in serious injury or worse. Please read and understand the Symbols below to make sure you understand what certain symbols mean, so that you do not attempt climbs beyond your abilities.
BOULDERING - PLEASE READ
Please note that some of the MAP coordinates of the boulders are incorrect. This will get sorted out in due time, but most of the boulders have the correct coordinates.
Note that while there are plenty of shorter problems, there are also HIGHBALL lines that require some planning on how to descend, including those that require a rope to get down, like 'Forgotten Dreams', which has a bolt allowing for a descent with a rope.
SYMBOLS
R: Potential long fall.
X: You will die if you fall.
DWS: Or Deep Water Solo, while there are no actual deep water solos at Paarl we have used it to indicate routes that are strictly solo, even though no water is involved.
Solo: No rope and no quickdraws, you're on your own.
Running: Slab routes where if you fall you have to run down the rock.
Bolts: Number of quickdraws required not including the chains.
B: Number of quickdraws required not including the chains.
Chains: Chains usually made up of two anchors.
C: Chains usually made up of two anchors.
A0: Aid climbing by pulling on quickdraws.
A1: Aid requiring a daisy chain, etrier and so on.
Stud: Hangerless bolt.
OLD BOLTS
There still remain some routes with rusty old bolts from the 80's and early 90's. These routes will be indicated as such within the text of this guide. It is not recommended to climb these until they have been rebolted.
RATINGS
Opinions will always vary, but we feel we have given most of the routes a fair shake.
CONTACT NUMBERS
Mountain Club of South Africa: 021-465 3412
Mountain Rescue / Ambulance: 10177
Police: 10111
CAMPING AND ACCOMMODATION
There is no camping allowed on the mountain at this time. You can however find plenty of guest houses in the town of Paarl itself. There are however picnic areas on the left before taking the left hand turn-off to the pay booth, and more (on the right) as you take the pay booth turn off left. Remember to have your car out of the picnic area parking before closing time, as a gate is closed at that time.