Kia Ora Wall
1
2
3
4
5
6
7
Kia Ora Wall 1 / 4
Kia Ora Wall
1
2
3
4
5
6
7
8
9
10
11
12
Kia Ora Wall 2 / 4
  • From the left hand end of this block traverse mid height until you become too tired, it gets dark or even better; you reach the pub.
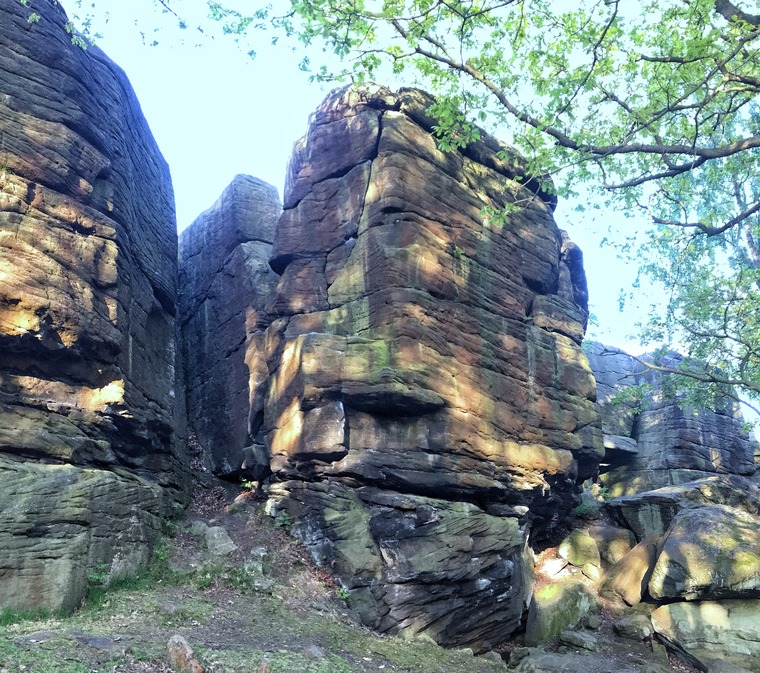
  • The undercut arete CD B20 P4 & TC A23 P3
  • Traverse from under the left arête and finish up 'Old Crack' CD B20 P6 (alternative) TC A23 P4
  • SDS eliminate right of the arete - over roof and up the wall between the arete and the ramp. CD B20 P7 & TC A23 P5
  • Follow the ramp line to the arete then up tis left of the crack. CD B20 P9 & TC A23 P7
  • Over the roof, up rampline then straight up the wall. CD B20 P8 & TC A23 P6
  • SDS under overlap then climb the line direct between the ramp and the crack. CD B20 P10
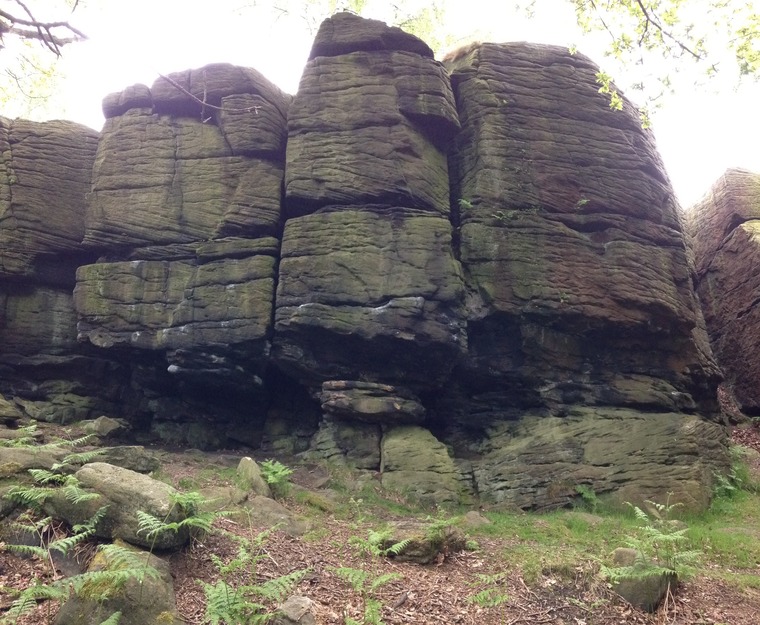
  • The crackline is good from standing or sitting (4+) and is a little harder if you stick to climbing it purely. CD B20 P11 & Tc A23 P8
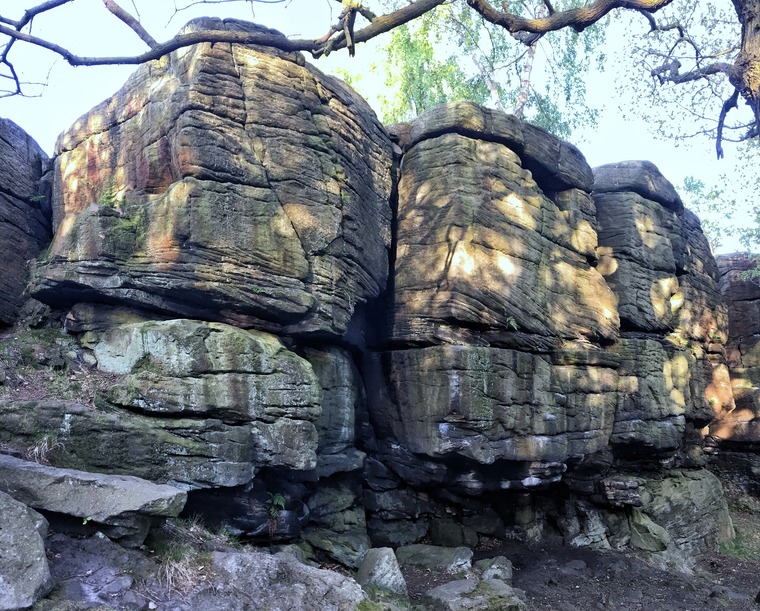
  • A committing journey through the centre of the high wall between the two cracks. CD B20 P12 & TC A23 P9
  • The wide crack line CD B20 P13 & TC A23 P10
  • The highball wall has its crux low down then eases toward the top. CD B20 P14 & TC A23 P11
  • From the crackline around the arete follow it left into the arete and up. CD B20 P15 & TC A23 P12
Kia Ora Wall
1
2
3
4
5
6
7
8
9
10
11
Kia Ora Wall 3 / 4
  • Follow the cracks up the RHS of the arete to a rounded finish. CD B20 P16 & TC A23 P13
  • From the crackline around the arete follow it left into the arete and up. CD B20 P15 & TC A23 P12
  • The the highball arete/rib chipped line is quite technical in parts. CD B20 P17 & TC A23 P14
  • The stemming groove. CD B20 P18
  • The thin wall in the back of the gully on the RHS between Vee Pod and Classic Orro-fice/Classic Rock. CD B20 P19
  • The wide crack/orifice inside the niche. Aka Classic Orro-fice Cd B20 P20
  • Climb the blunt rib and features to the right of the crack. CD B20 P21
  • Mantel from the roof onto the ledge and follow the flake/crack to finish. CD B20 P22 & TC A24 P1
  • Climb the roof and suddenly realise the huge challenge you've signed up to, bags of confidence are needed to see off this behemoth of a route. CD B20 P23 & TC A 24 P2
  • The direct finish to Austin's Hangover - go direct instead of traversing off to join Jam Crack. Rounded finish... Cd B20 P24 (alternate) & TC A24 P4
  • The highball blunt arete via good holds to the break high and left. Exit right to top out via top of Jam Crack. CD B20 P24 & TC A24 P4
Kia Ora Wall
1
2
3
4
5
6
7
8
Kia Ora Wall 4 / 4
  • The direct finish to Austin's Hangover - go direct instead of traversing off to join Jam Crack. Rounded finish... Cd B20 P24 (alternate) & TC A24 P4
  • The highball blunt arete via good holds to the break high and left. Exit right to top out via top of Jam Crack. CD B20 P24 & TC A24 P4
  • Line between the crack and the arete - cross the roof from the left then finish direct via Jam Crack. CD B20 P27 & TC A24 P5
  • The perfect jam crack? Bad landing. CD B20 P28 & TC ?A24 P6
  • Up the wall via flakeline/vague flakes - exit left along breaks or head right to finish direct via the roof. CD B20 P29 & TC A24 P7
  • SDS previous problem from under the overhang. CD B20 P30 & TC A24 P7a
  • The rippled wall. YMc Vol.2 pg.591 P186
  • Traverse from the chockstone along the leftward rising break to finish via the top of Jam Crack.